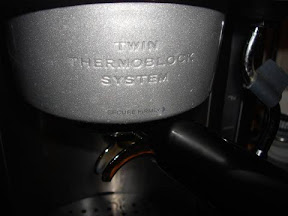
A simple guide to using an electric manual espresso machine. The photo tutorial is divided into 2 parts: the espresso making stage; and the milk frothing stage.
Below, a list of the basic equipment needed.
1. An espresso Machine
2. A grinder
3. Milk Pitcher (jug)
4. Thermometer (for milk)
5. Cups
6. Portafilter
7. Coffee beans
8. Water (filtered water preferred)
9. Milk (full cream gets best resutls)

PART I
Here we prepare the espresso, which is the essence and base for any coffee drink whether it’s machiatto, cappucino, flat white or cafe latte. Some espresso machines have a hot water spout. This can be used to pre-heat the cups before brewing the espresso to ensure that you get a hot drink without having to over-heat or even burn the milk. As you will see in Part II, I prefer to remove the milk around ten degrees under the norm for cafes as I think you get more sweetness, the only setback is that the end drink will be cooler than expected.
Turn on the espresso machine to warm up and pre-heat the cups by filling them with pre-boiled water.
 Pre heat cups with boiling water
Grind the coffee directly into the basket of the portafilter.

Grind on demand straight into portafilter
Tamp the coffee grinds to create a flat surface.
 Using the coffee tamp
Top up with more ground coffee.

At the grinder again
Tamp again and ensure the rim of the basket is clean and free of excess coffee grounds.

Ready for the machine
Position the portafilter into the grouphead and slide to the right of the arrow indicator.

Ensure the portafilter is locked in correctly
Empty the water-filled cups and place under the coffee spouts.

Cups ready for the brewing process
Now turn the machine on and watch attentively as the coffee is extracted to see whether it was a hit or a miss result.

First few seconds of extraction
Resistance in the pour and visible crema is a good sign.

When magic happens
Stop the extraction once you have about 30mL of coffee in the cups.

About a shot of coffee is enough only the crema is visible
Place cups on warming plate located on top of the machine.

Resting the cups on the warming plate
Empty out brewed coffee remains into the waste container.

Empty out coffee remains
PART II
Now we look at frothing the milk to get a silky/velvety consistent texture ideal for cappucinos and lattes. This is the most difficult part of espresso coffee making and it took months if not years for me to learn. Practise is the best and only way to master this step so be patient while you are learning.
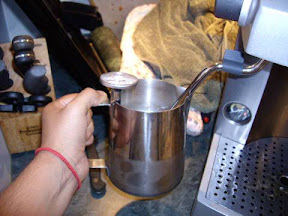
Add fresh milk to the pitcher until the beak.

Fresh milk and thermometer in the pitcher
Now flush the steam wand into the collector drain before hand to remove any possible build up from before. This also prepares the wand for the next step by ensuring the pressure and heat are at their highest right before frothing.

Flushing the steam wand
Hold the milk pitcher at a slight angle away from the wand. Only just immerse the wand tip into the milk, about 1cm or 1/2 and inch.

Good firm hands are needed
Turn on the steam wand, bubbles may form in the first 10 seconds. Nothing to worry about as they will soon get smoothed out.

Bubbles form at the start due to the pressure of the steam
Keep the angle and the wand tip submerged in the milk at all times. Bubbles are now slowly disappearing.

The milk expands slightly as it froths
Turn off the steam wand once the temperature reaches 50°. By the time the wand turns off completely it will reach 55°

At 55°, the milk is still sweet and frothed consistently
Once you place the milk pitcher aside, immediately wipe down the wand with a moist cloth and flush into the tray once again. It’s important to keep the steam wand clean at all times.

Always wipe down the wand right after use
Now you will free pour the milk into the cup of coffee, piercing through the layer of crema and mixing both liquids together as the level rises.

One motion free pour without any interruptions
It’s good to see that the top layer of the finished cappucino has both brown and white colours visible as this indicates that the milk has mixed well with the crema, providing a consistent taste and texture throughout the beverage.

Consistent aPART Ind well frothed milk on these coffees
I’m no master of latte art but it’s good to constantly practise.

The finished product
And that’s how I prepare espresso coffee at home. Please comment or add suggestions.
-RB

This is looking so good.
Thanks.
This is looking so good.
Thanks.
I found this page bookmarked and I really liked what I read. I will definately bookmark it too and go through the other posts tomorrow.
I found this page bookmarked and I really liked what I read. I will definately bookmark it too and go through the other posts tomorrow.